
Table of contents
Forms are often the key element of a website. They should generate conversions, be user-friendly and GDPR-compliant, mobile-optimized and best of all directly linked to your systems (e.g. CRMs or newsletter tools). Meeting all these requirements is not easy. Especially when it’s not just a simple contact form, but a large multistep form, for example.
In this article we would like to show you how to easily create such forms with GREYD.Forms and even evaluate the conversion of your form directly in the backend (i.e. without external analytics tool). GREYD.Forms is the form generator of GREYD.SUITE – the world’s first block-based all-in-one suite for professional WordPress websites.
Step 1: Create Concept
Before you start building your form, you should first create a concept and answer the following questions:
- What goal are you pursuing with the form (e.g. generate leads, request information, event registration, etc.)?
- Which target group is addressed?
- What should happen after submitting the form?
- Which data should be queried and do they have to be passed on to external systems (e.g. CRM) afterwards?
A good concept is everything. From this, you can then determine which type of form is suitable for your specific use case and how the form should be structured. If necessary, it can be helpful to sketch out the rough structure of your form in advance.
As soon as your form concept is ready, you can start creating it.
The Multistep Form
For long forms with many form fields, it can make sense to build the form as a multistep form. A multistep form often increases usability and thus the conversion rate, as it simplifies the process of filling out the form and the user is not directly deterred by too many fields.
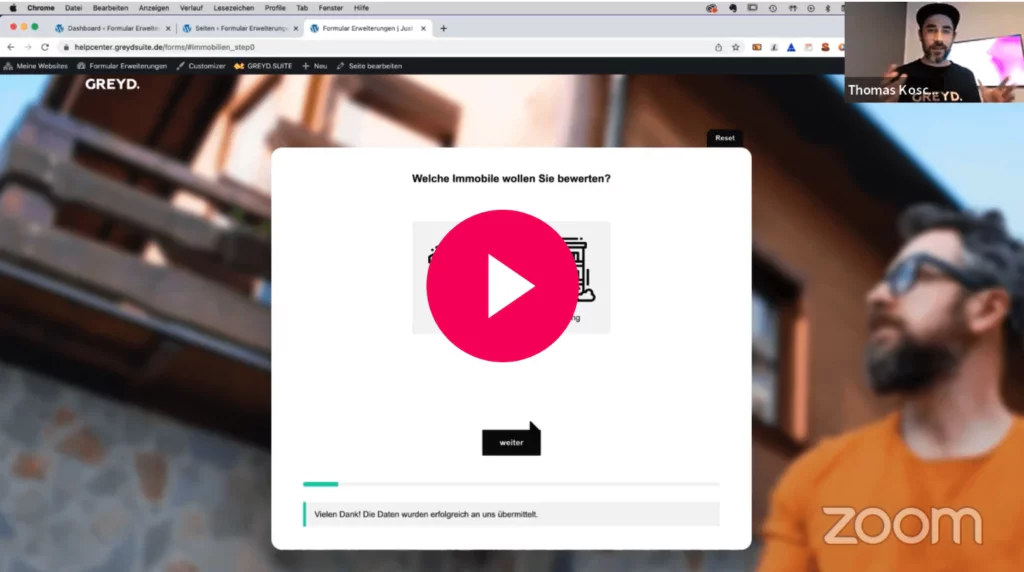
In addition, GREYD.Forms allows you to tailor multistep forms to your users, for example by using conditional containers to vary the sequence or content of questions depending on previous input. In our (German) webinar on this topic, we built a real estate evaluation form as an example.
GREYD offers webinars on different topics at regular intervals. Stay up-to-date and receive all important information in our newsletter.
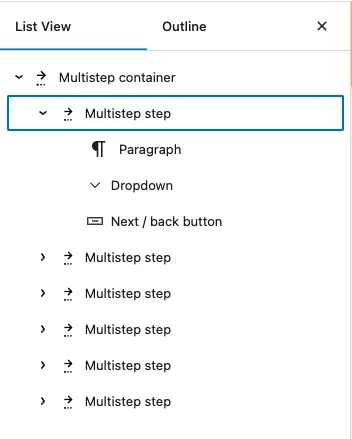
Tip: Multistep forms are created with GREYD.Forms with the Multistep Container Block. In order to keep the overview while building and also to simplify testing, we recommend you to build your form without Multistep Containers first and insert them only in the last step.
Step 2: Build Multistep Form
Below we would like to give you some tips to create a user-friendly multistep form for both the user in the frontend and for you in the backend.
One thing in advance: you should always make it as easy as possible for the user, because the simpler and more understandable your forms are designed, the higher is the probability that they will be filled out completely.
By using images or graphics you can make your form more appealing and clearer, so you don’t just line up input fields. GREYD.Forms offers you a helpful feature for this with the image tile block.
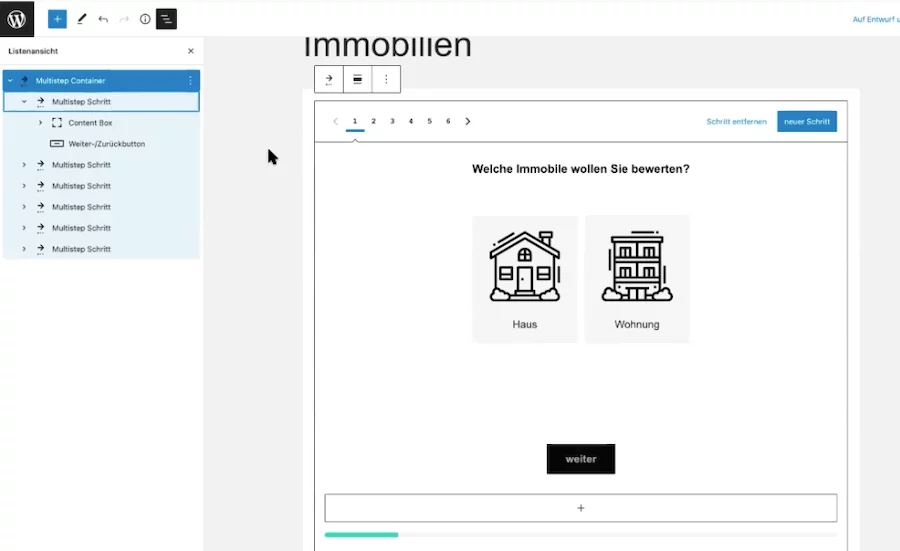
In our example form, we worked with the content box block in every step. This way, you can not only ensure a uniform height of your form, but also make it easier for you to find your way around in the backend. Simply give each content box a number or name as an HTML anchor, and you’ll always see exactly where you are in your list view.
Help notes are a good way of explaining to users in more detail what should be entered in the individual fields. As soon as a user hovers over the info icon, the hint appears. You can enter the corresponding info texts individually in GREYD.Forms. The autofill option can make filling in more convenient for certain field types (e.g. address data, phone number, etc.).
Another important point is the use of next buttons, unless the form automatically jumps to the next step after filling out all fields within one step. In any case, you should offer back buttons.
In order to better evaluate your form later on, you should definitely assign field names for certain parent elements, for example image tiles. This field name will then be stored and evaluated directly in the database. We will go into the evaluation of forms in more detail later on.
By the way, you can find detailed tutorial videos for all form blocks in our help center.
The Design of Your Form
Seamlessly integrating forms into the design of the rest of your website is often one of the biggest hurdles when using form plugins. This is because the form plugin doesn’t always offer the same design options as, say, your WordPress theme. GREYD.SUITE offers the advantage here that it has a form generator directly integrated with GREYD.Forms. Forms on GREYD.SUITE websites therefore automatically adopt the design settings of your website.
Otherwise, there are no limits to your creativity in form design. For example, you can also design the progress bar for your multistep form individually (e.g. bars or pagination or even without any progress bar at all).
Tip: The GREYD Editor Helper allows you to customize the preview of your form in the backend so that you can view your form in exactly the width and on exactly the background color as you want to embed the form later in the frontend.
Step 3: Set Follow-up Actions
Once you have created your form, now comes the follow-up actions. What should happen after submitting the form? Which e-mails should be sent? Should the data be sent to your CRM?
GREYD.Forms provides you with various options regarding follow-up actions for the user, which you can set individually for each form.
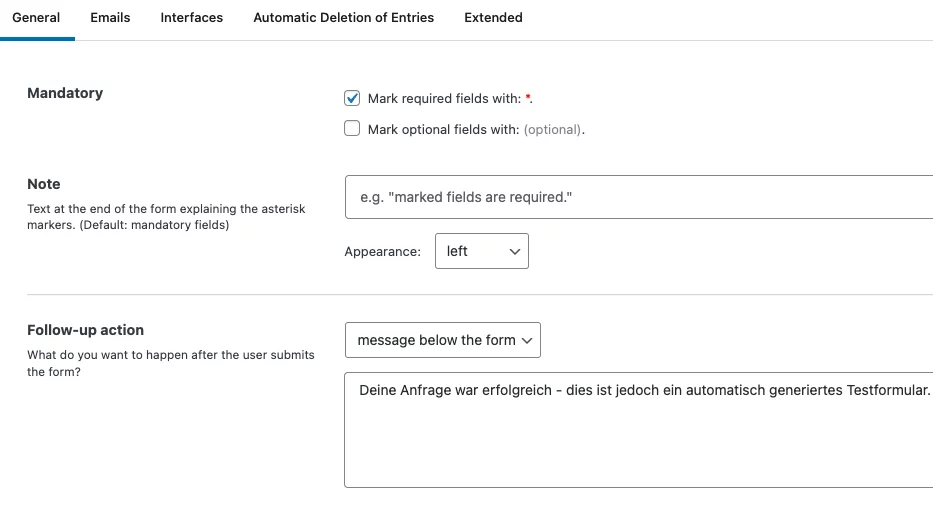
You will also find the option to set the double opt-in (DOI). This way you can ensure that your forms are compliant with the GDPR.
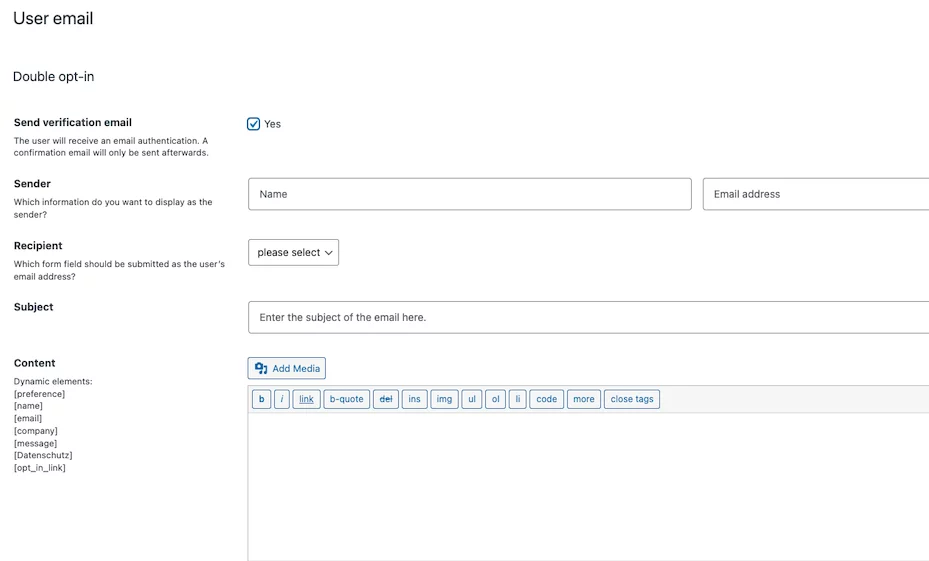
Step 4: Backend Settings
When you set up email follow-ups, in addition to setting up these mails yourself, you should also think about general settings for sending mails. Otherwise, your emails may end up in the user’s spam folder.
To set up SMTP for GREYD.Forms, you have to go to Forms in the backend and then to Settings. There you will find the SMTP settings section. Follow the instructions to easily set up your SMTP.
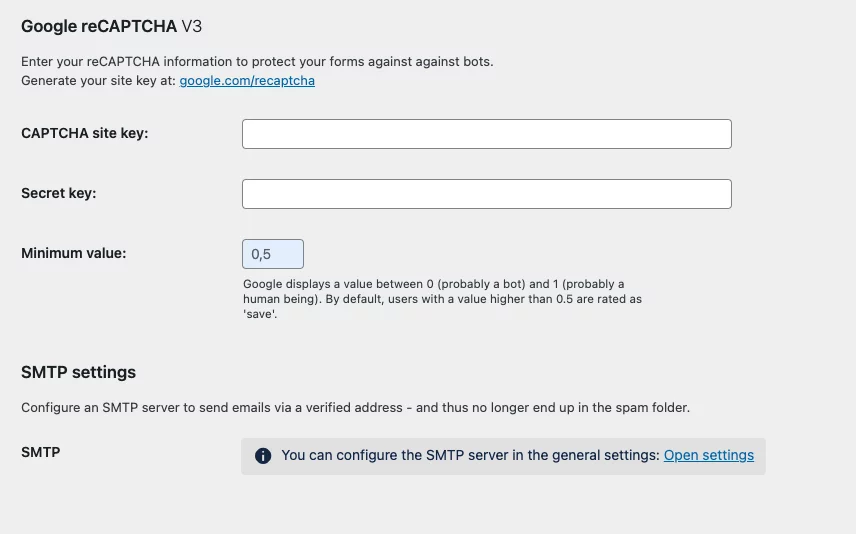
By the way, GREYD.Forms automatically protects your forms from bots with native honeypot integration. You can also use Google reCAPTCHA for your forms. You can also find the settings for this in your backend under Forms.
Form Analytics directly in the Backend
How well your forms are accepted by users and where there may be a need for optimization is usually not so easy to find out. GREYD.Forms supports you in many ways. For example, each step of your multistep form automatically receives its own URL path. This allows you to analyze the performance of your forms with Google Analytics.
But that’s not all! With GREYD.Forms you can view statistics of your forms directly in the backend, without the need to connect to an external tracking tool like Google Analytics. And of course, the whole thing is compliant with the GDPR.
To easily evaluate your forms in your backend, click in the menu on the left under Forms and then on Statistics. Here you can select one of your forms and get the corresponding statistics.
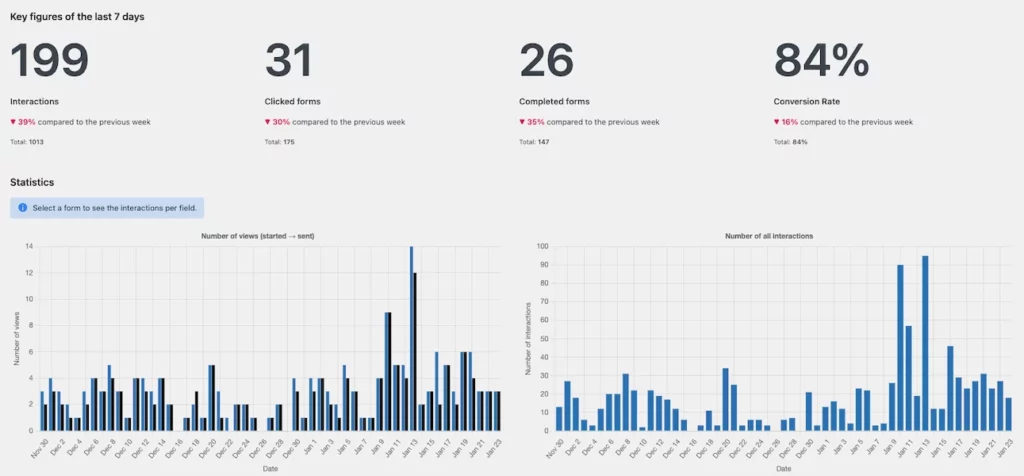
The evaluation shows you, among other things, at which point in your multistep form users break off. In the report you can now also see the field values that you have previously set for your form. If you want to know more about the evaluation of GREYD.Forms forms, take a look at our help center.
GREYD.SUITE is still completely new territory for you? But you are curious about what it has to offer? Then test it now for free with all features and for an unlimited time.